Choosing the right Bathtub Adapter can turn an awkward tub into a more useful, comfortable space. However, not every adapter fits every faucet, shower hose, or tub edge. Thread size, faucet shape, water pressure, clearance, and sealing materials all matter. A fitting that looks perfect online may wobble, leak, or block the diverter once installed.
Richard Trethewey, a plumbing and heating expert known for his work on This Old House, offers a useful reminder: “Water always finds the path of least resistance.” That warning feels especially relevant during testing. A slow drip behind a wall can become a costly repair. So, this guide examines seven promising Bathtub Adapter options for 2026, with attention to compatibility, installation effort, materials, and everyday performance.
Some adapters suit standard threaded spouts. Others work better with slip-on designs or handheld shower connections. A few focus on renters who need tool-free installation. The best choice depends on your actual tub, not just a product rating. Measure twice. Check the manufacturer’s fitting chart. Then inspect the gasket before tightening anything.
This review is not flawless. Product availability and bathroom hardware standards can change quickly. Some claims may also depend on installation quality. Still, the comparisons aim to reflect real use: wet hands, limited space, stubborn threads, and that annoying first leak. A good adapter should feel secure, direct water cleanly, and disappear into your routine. That is the standard these seven options must meet.
What Bathtub Adapters Are and How They Work
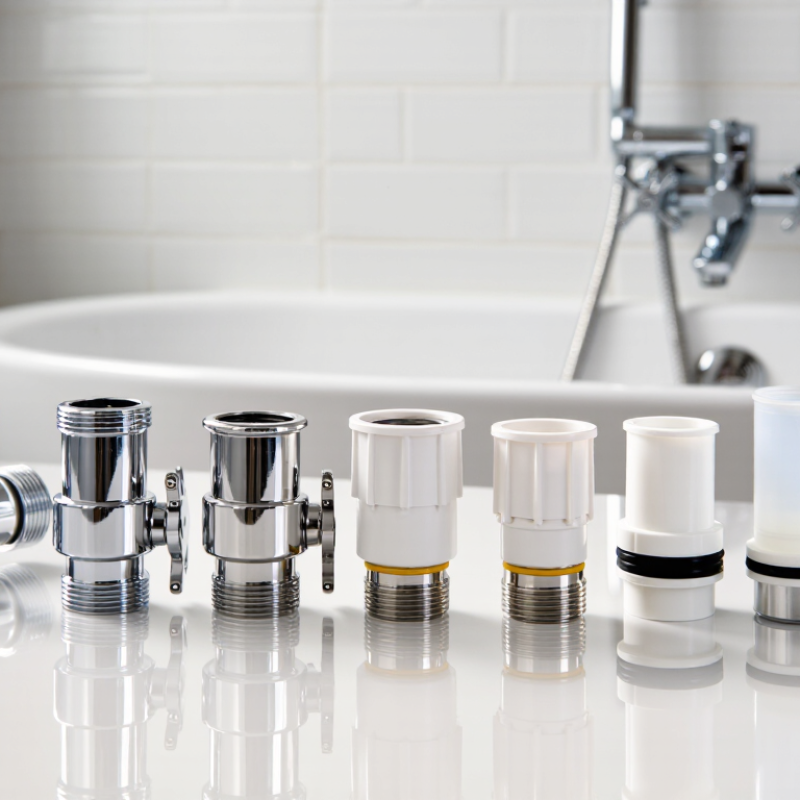
A bathtub adapter connects a tub faucet to a handheld shower hose. Most models use a slip-on sleeve, threaded collar, or built-in diverter. When the diverter moves, water shifts from the tub spout to the hose. The adapter does not increase water pressure. It redirects the existing flow.
The U.S. Environmental Protection Agency’s WaterSense guidance reports that showering represents nearly 17% of indoor residential water use. The U.S. Department of Energy also estimates water heating uses about 18% of household energy. A well-fitted adapter can support shorter, more controlled rinsing, but it cannot fix wasteful habits. In practical use, the most common problem is a small leak behind the collar. It may appear harmless. Over time, it can wet the wall, loosen fittings, or create staining. Some adapters also fit only smooth, standard tub spouts. Older, custom, or nonstandard faucets need closer measurement.
Tips: Measure the spout diameter first. Check for threads, a diverter, and enough clearance below the faucet. Choose a model with a rubber gasket, then tighten it by hand. Run water for one minute and inspect every connection with a dry tissue. If the tissue becomes damp, stop and reseat the adapter. Do not assume “universal” means every tub. That label is often too optimistic. A thermostatic shower valve may also improve temperature stability, but professional installation is safer when wall plumbing is involved.
Bathtub adapters connect a tub spout, shower arm, faucet outlet, or drain opening to another accessory. The chart below compares seven common adapter types by their intended connection point. A value of 1 means the adapter is normally designed for that use; 0 means it is not.
Tub-spout and shower-arm adapters are commonly used for handheld shower hoses, while faucet-aerator and garden-hose adapters require a compatible threaded faucet outlet. Always verify the outlet type, thread size, water pressure, and available clearance before selecting an adapter.
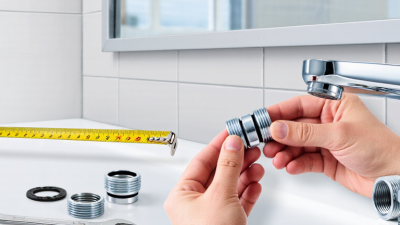
Choosing a bathtub adapter starts with fit, not appearance. Measure the faucet outlet, thread size, spout shape, and clearance around the tub. A universal-looking adapter may still leak on a short or uneven spout. I learned this after tightening one by hand and finding a slow drip beneath the bath mat. Check whether the unit uses a threaded connection, clamp, or rubber seal. Threaded models often feel secure, but they need matching dimensions.
Material affects durability and daily comfort. Solid metal usually handles repeated adjustments better than thin plastic, while a soft gasket protects polished surfaces. Look for corrosion-resistant parts, rounded edges, and a hose that bends without kinking. Water flow also deserves attention. A narrow internal passage can make filling painfully slow. Some adapters include a diverter, allowing water to switch between the tub tap and an attached hose. Test whether the lever moves smoothly with wet hands. Small controls become frustrating quickly.
Safety features matter when children, older adults, or pets use the tub. A stable grip, leak-resistant seal, and controlled spray can reduce splashing and slipping hazards. Confirm that the hose reaches the intended area without pulling the adapter loose. Installation should require ordinary tools, clear instructions, and no permanent plumbing changes. I would also check return terms and replacement gasket availability. That detail is easy to miss. Even careful measurements can be wrong, especially with older fixtures. Take a photo, measure twice, and expect some trial and error.
Choosing the right bathtub adapter depends on the tub’s shape, faucet location, and connection style. A slip-on spout adapter suits older tubs with smooth, exposed spouts. A threaded spout adapter works better when the spout has visible internal or external threads. Check the thread direction before ordering. Small differences matter.
Deck-mounted tubs need a compact diverter adapter that fits between the faucet and shower hose. Roman tubs usually require a wider adapter with longer reach, because their faucets sit above a broad rim. Clawfoot tubs benefit from supply-line adapters designed for exposed plumbing and flexible positioning. For freestanding tubs, a wall-mounted shower adapter can provide a practical handheld connection without drilling the tub.
A universal handheld shower adapter offers the most flexibility, but “universal” does not always mean effortless. Measure the faucet outlet, hose diameter, and available clearance first. Use a new rubber washer, tighten connections by hand, then add slight tool pressure if needed. Over-tightening can damage plated fittings. I also recommend running cold water briefly before testing full pressure. It reveals leaks without making the floor dangerously wet.
Plastic adapters are lighter and often cheaper, while solid metal handles repeated adjustments better. Still, heavy metal parts may strain older spouts. That trade-off deserves attention. After installation, inspect the connection after several baths, because a dry first test can miss slow dripping.
| Adapter Type | Best For | Compatible Tub or Faucet | Common Connection Size | Installation Method | Typical Materials | Main Advantage | Important Limitation |
|---|---|---|---|---|---|---|---|
|
Slip-On Tub-Spout Diverter Adapter Best for standard slip-on spouts |
Renters and homeowners who want to add a handheld shower without replacing the existing tub spout. | Standard wall-mounted spouts secured with a bottom set screw. | Designed around common 1/2-inch supply connections; the adapter must match the spout outlet and retaining screw location. | Slides over the existing spout and is tightened with a hex set screw; usually requires an Allen key. | Chrome-plated brass, stainless steel, silicone washers, and rubber seals. | Fast installation with little or no pipework modification. | Not suitable for threaded spouts, damaged spouts, or spouts with unusual outlet dimensions. |
|
Threaded Tub-Spout Diverter Adapter Best for threaded spouts |
Fixed wall-mounted tubs that already use a threaded tub spout. | Male- or female-threaded spouts, depending on the adapter design. | Most residential bath connections use 1/2-inch pipe threads; some older installations differ. | Unscrew the existing spout, apply approved thread sealant where appropriate, and install the adapter. | Brass or stainless steel with plated exterior finishes. | Provides a more secure connection than a universal slip-on fitting when the thread type matches. | Incorrect thread type or excessive tightening can damage the fitting or the pipe inside the wall. |
|
Tub-Spout Handheld Shower Diverter Best for everyday handheld use |
Families, bathing children, washing pets, and cleaning the tub surround. | Compatible slip-on or threaded tub spouts with a dedicated hose outlet. | Usually connects to a handheld shower hose with a standard 1/2-inch shower-hose thread. | Installs between the tub spout and the handheld shower hose; a diverter lever directs water to the spout or hose. | Plated brass or engineered polymer body with rubber or silicone washers. | Allows switching between tub filling and handheld spraying without changing the faucet. | Water pressure at the hand shower may be lower when the diverter or tub spout has a restrictive passage. |
|
Clawfoot Tub Faucet Diverter Best for clawfoot tubs |
Freestanding clawfoot tubs with exposed supply lines and deck- or wall-mounted faucet sets. | Clawfoot faucet assemblies with a suitable outlet or replaceable shower riser connection. | Common exposed-tub fittings include 1/2-inch pipe connections, but faucet spacing and thread standards vary. | Connects to the faucet outlet or shower riser; may require a union, washer, or thread adapter. | Solid brass or stainless steel, often with plated finishes. | Works with exposed plumbing and preserves the freestanding appearance of the tub. | Faucet center-to-center spacing, outlet height, and thread pattern must be measured before purchase. |
|
Roman-Tub Deck-Mount Adapter Best for deck-mounted faucets |
Wide tubs with faucets installed directly on the rim or surrounding deck. | Roman-tub faucets with an accessible diverter port or a replaceable deck-mounted hand-spray connection. | Many hand-spray hoses use 1/2-inch connections; faucet bodies may use larger manufacturer-specific ports. | Connects beneath the tub deck or to the faucet’s accessory outlet, normally using compression or threaded fittings. | Brass, stainless steel, braided stainless-steel hose, and elastomer seals. | Keeps the handheld hose close to the tub and avoids modifying the wall behind the bath. | Limited access beneath the deck can make installation difficult; the faucet must have a compatible outlet. |
|
Universal Faucet-to-Shower Hose Adapter Best for mixed or uncertain faucet types |
Temporary setups, older bathrooms, and faucets that do not use a standard tub-spout diverter. | Selected faucets with a removable aerator or accessible outlet thread. | Common aerator sizes include 15/16-inch male and 55/64-inch female faucet threads; hose ends commonly use 1/2-inch shower threads. | Remove the faucet aerator, install the matching threaded insert and gasket, then attach the shower hose. | Chrome-plated brass, stainless steel, ABS or other durable engineering plastic, and silicone gaskets. | Useful when the tub faucet itself is the easiest connection point. | Not intended for sealed pull-out faucets, non-removable aerators, or faucets with proprietary outlets. |
|
Portable Tub-Fill Shower Adapter Best for temporary or freestanding use |
Freestanding tubs, temporary bathing areas, dormitories, and bathrooms without a permanent shower outlet. | Faucets with enough clearance for a clamp, hook, or flexible sleeve around the spout. | Usually includes a flexible hose and a hand-spray connection using a standard 1/2-inch shower-hose thread. | Fits over or around the faucet spout with a gasket, clamp, or flexible collar; no permanent plumbing changes are normally required. | Flexible silicone or rubber collar, plastic or brass connector, and braided or polymer hose. | Easy to remove and suitable for short-term use or rental properties. | Fit and sealing depend heavily on the spout shape; it may not work with very short, curved, or irregular spouts. |
Connection sizes and materials listed are common residential specifications, not universal standards. Always measure the existing spout, faucet outlet, thread type, and available clearance before selecting an adapter.
When comparing the 7 best bathtub adapters for every tub in 2026, start with the faucet, not the adapter’s appearance. Measure the faucet outlet and check its thread type. A slip-on faucet needs a tight rubber seal and enough spout length. A threaded faucet requires matching internal or external threads. Small differences can cause leaks.
Your plumbing setup matters too. Some adapters divert water through a handheld hose, while others connect to a shower pipe. Check the diverter position, water pressure, and available clearance around the tub. I once overlooked a short spout, leaving the adapter angled toward the wall. It worked, but poorly. A tape measure would have prevented that mistake. Remove old tape and mineral buildup before fitting anything.
Tips: Use a thread gauge when possible. Do not force mismatched fittings. Hand-tighten first, then add a small wrench adjustment. Open the water slowly and watch the connection for one full minute. If water sprays from the seam, stop and reassess the washer, threads, and adapter size. Older plumbing can be irregular, so measurements may not tell the entire story. A flexible connector can help, but it should not bend sharply or carry unnecessary tension.
Choosing among seven bathtub adapters starts with the tub edge, not appearance. Measure its width, curve, and clearance near the faucet. I have seen a secure-looking adapter wobble because its clamp met a sloped surface. Check the instructions and confirm the adapter suits your tub material. Installation should feel controlled, never forced. Clean and dry contact areas first. Tighten knobs gradually, alternating sides when possible. Stop if plastic bends or the seal folds. A small gap can become a leak.
After installation, test with low water pressure. Watch joints for two minutes. Keep hoses away from walking paths and hot surfaces. Never leave a child or vulnerable user unattended, even with a stable adapter. Recheck the fitting before each use. Suction cups may lose grip as temperatures change. That detail is easy to miss. If the adapter shifts, remove it and inspect the seal, clamp, and tub surface. Do not improvise with tape or damaged parts. My own mistake was trusting yesterday’s tight fit; bathrooms change with heat and moisture.
Tips: Rinse the adapter after every use, especially around threads and drain openings. Use mild soap and a soft cloth. Avoid abrasive powders, sharp tools, and harsh solvents, which can scratch surfaces or weaken seals. Let every part dry before storage. Once a week, inspect cracks, discoloration, loose screws, and flattened gaskets. Replace worn sealing parts promptly. Keep a simple maintenance note. It takes less than a minute.