How to Install an Angle Stop Valve for Efficient Plumbing Solutions
In the realm of plumbing, efficiency and reliability are paramount, and one critical component that often goes overlooked is the Angle Stop Valve. This valve serves as a vital control point for water flow, allowing homeowners and professionals to manage their plumbing systems more effectively. According to plumbing expert John D. Miller, "Installing an Angle Stop Valve not only enhances the control of your water supply but also minimizes the risk of leaks and damages." His insights underscore the importance of understanding how to properly install this essential device.
The installation of an Angle Stop Valve is not just a technical task; it represents a proactive approach to plumbing maintenance. When done correctly, it can lead to significant improvements in system efficiency and longevity. Many homeowners underestimate the impact of a well-functioning valve, yet it plays a crucial role in situations ranging from routine repairs to emergency plumbing issues. In this guide, we will delve into the step-by-step process of installing an Angle Stop Valve, ensuring that you are equipped with the knowledge needed to tackle this important task with confidence.
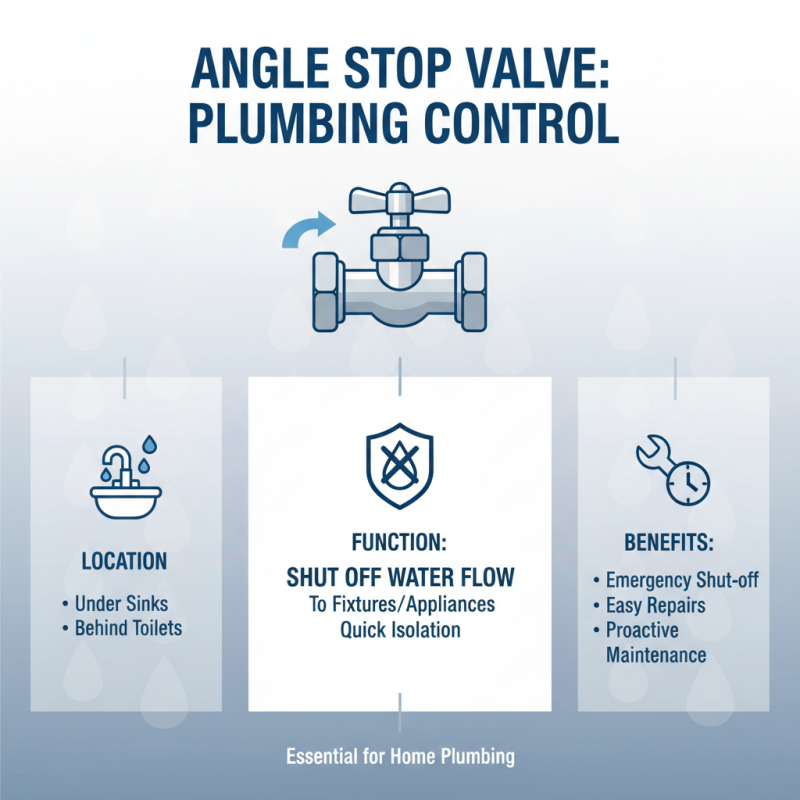
Understanding the Angle Stop Valve and Its Purpose in Plumbing
An angle stop valve is a crucial component in plumbing systems, serving as a control mechanism for water flow to various fixtures and appliances. Typically located under sinks and behind toilets, this valve allows homeowners to quickly shut off water supply during repairs or emergencies, providing a practical and efficient plumbing solution. Understanding its purpose not only aids in effective plumbing maintenance but also empowers individuals to manage their home water systems proactively.
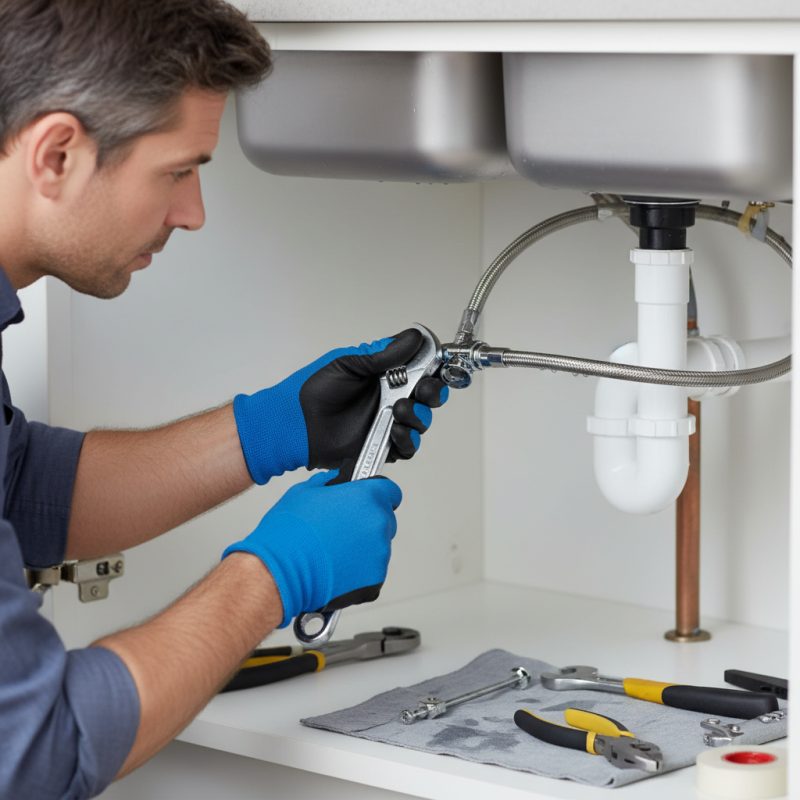
When installing an angle stop valve, it's vital to ensure the correct sizing and placement to prevent leaks and ensure optimal performance. Always turn off the main water supply before starting the installation. Utilize Teflon tape on the threaded connections for a secure seal, and double-check for any signs of dripping after installation.
**Tip:** Check the angle stop valve regularly for signs of wear or corrosion to maintain its functionality. A well-maintained valve can save homeowners from potential water damage and costly repairs.
Another useful tip is to familiarize yourself with the valve's operation, ensuring that you can easily locate and turn it in case of an emergency. Knowing how to operate the valve can significantly reduce the amount of water that could potentially cause damage during a leak.
Tools and Materials Needed for Installing an Angle Stop Valve
When it comes to plumbing projects, installing an angle stop valve is a crucial step that ensures both efficiency and reliability in water supply systems. To successfully carry out this installation, having the right tools and materials on hand is essential. Key tools you will need include an adjustable wrench, a pipe cutter, thread seal tape, and a screwdriver. The adjustable wrench is particularly important for securing the connections without damaging the fittings. Additionally, using a pipe cutter will provide a clean cut, reducing the chances of leaks during and after installation.
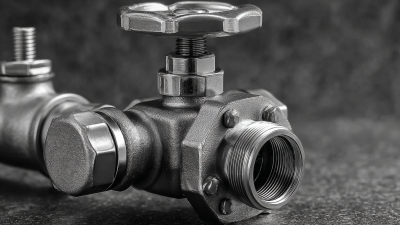
In terms of materials, you will need an angle stop valve, which often comes in various sizes such as 1/2 inch or 3/4 inch, depending on your plumbing system. A high-quality valve made from brass or chrome-plated materials is recommended, as these options offer durability and corrosion resistance. Moreover, don’t forget to stock up on fittings and possibly a new supply line if the existing one shows signs of wear. According to industry reports, improperly installed or low-quality angle stop valves can lead to approximately 20% of all plumbing issues, highlighting the importance of using adequate materials and following proper installation procedures. By ensuring you have the correct tools and components, you set the stage for a successful and effective plumbing project.
How to Install an Angle Stop Valve for Efficient Plumbing Solutions - Tools and Materials Needed for Installing an Angle Stop Valve
| Tool/Material |
Description |
Quantity Needed |
Estimated Cost |
| Angle Stop Valve |
Valves used to control water flow |
1 |
$10 |
| Adjustable Wrench |
Tool for gripping and turning nuts and bolts |
1 |
$15 |
| Teflon Tape |
Tape used to seal threads on pipes |
1 roll |
$3 |
| Pipe Cutter |
Tool for cutting pipes |
1 |
$25 |
| Bucket |
Container to catch any spills |
1 |
$5 |
| Plumber's Putty |
Sealant used during installation |
1 tub |
$7 |
Step-by-Step Guide to Installing the Angle Stop Valve
Installing an angle stop valve can significantly enhance your plumbing system's efficiency, providing better control over water flow to various fixtures. To begin the installation, first, gather the necessary tools, including a pipe wrench, adjustable pliers, and Teflon tape. Shut off the main water supply and drain any residual water from the pipes to ensure a smooth install. Next, identify the correct location for the angle stop valve, typically found near sinks or toilets, and prepare the existing pipe for connection.
When you’re ready to install, use the pipe wrench to remove any existing fittings. Wrap Teflon tape around the threads of the new valve to create a watertight seal. Screw the valve onto the pipe, ensuring it's tightly secured. Be mindful of the direction of flow indicated on the valve and adjust the handle appropriately. Once everything is connected, slowly turn the main water supply back on and check for any leaks.
Tips: Always double-check the connections before turning the water back on to prevent any surprises. If you notice any leaks after installation, it may be necessary to tighten the fittings further or reapply Teflon tape. Remember, taking your time during installation will lead to better long-term results, so don’t rush through any steps.
Maintenance Tips for Long-lasting Performance of Angle Stop Valves
To ensure the long-lasting performance of angle stop valves, regular maintenance is crucial. Start by inspecting the valves periodically for any signs of leaks or corrosion. Even minor leaks can lead to significant water wastage and potential damage over time. If you notice any issues, it’s essential to address them immediately, as neglecting maintenance can result in more severe problems down the line.
Additionally, it is advisable to clean the valve periodically to prevent mineral buildup, which can hinder its operation. A gentle scrub with a soft brush and a mixture of vinegar and water can help remove any deposits without damaging the valve. Furthermore, exercising the valve regularly—by turning it on and off a few times—can keep components moving freely and prevent them from seizing. By adopting these simple maintenance habits, you can enhance the durability of your angle stop valves and ensure they function efficiently for years to come.
Angle Stop Valve Performance Over Time
This bar chart illustrates the performance rating of angle stop valves over varying years of usage. As shown, valves generally maintain a higher performance rating within the first few years, with gradual decline as they age, underscoring the importance of regular maintenance for longevity.