How to Install a Bidet Sprayer?
How to Install a Bidet Sprayer? The job looks simple: a shutoff valve, a T-adapter, a flexible hose, and a sprayer beside the toilet. The details matter. A loose connection can drip behind the bowl, where a small leak may go unnoticed. Before turning a wrench, check the toilet’s water connection, available space, and the sprayer manufacturer’s instructions.
Water use is part of the wider bathroom picture. The U.S. Environmental Protection Agency’s WaterSense program reports that toilets account for nearly 30 percent of an average home’s indoor water use. That figure concerns toilets, not Bidet Sprayer use, so it should not be treated as proof of a particular water-saving benefit. Still, it shows why careful plumbing choices matter. Keep towels nearby, close the shutoff valve fully, and check every joint after restoring water pressure. Then inspect again later. A dry floor is reassuring, but it is not a substitute for a second leak check.
This guide will walk through the installation in clear, practical steps, including tool preparation, adapter fitting, hose routing, and testing. One source limitation deserves honesty: no verifiable, attributable quotation from a named Bidet Sprayer specialist was provided, so I will not invent one. Product instructions and local plumbing requirements should guide the final setup. Small fittings matter. So does patience. A connection that feels tight may still need inspection.
Confirm the Toilet Supply Size, Often 3/8-Inch Compression
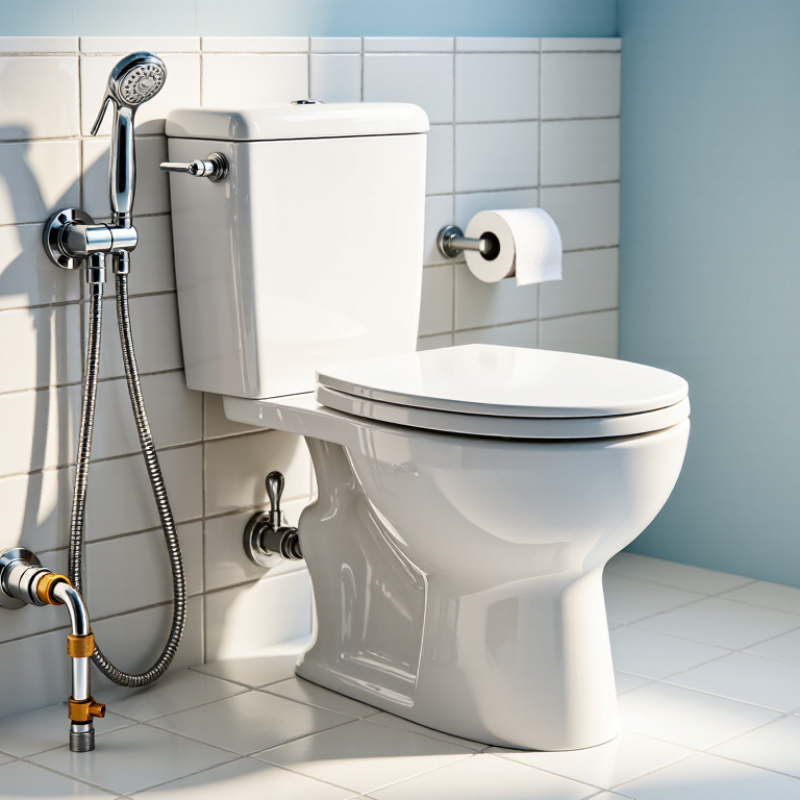
Before installing a bidet sprayer, check the toilet’s supply connection instead of relying on the product description alone. Many shutoff valves use a 3/8-inch compression outlet, but fittings can vary. The connection at the toilet tank is often a different size, so a tee may need two different ends. Check both points.
Turn off the shutoff valve and flush the toilet to reduce water in the tank. Place a small bowl or towel under the hose connection. Unscrew the supply hose carefully, then inspect the valve outlet and hose nuts. A 3/8-inch compression fitting has a nut and sealing surface; do not identify it by appearance alone if you are unsure. Compare measurements with the sprayer kit’s fitting guide, or take the hose to a plumbing supplier for confirmation. A close guess can still leak.
Fit the correct tee between the shutoff valve and the tank hose, then connect the sprayer line as directed. Hand-tighten first. Use a wrench only as needed, since overtightening can damage threads or seals. Restore the water slowly and watch each joint with a dry tissue. Check again after several minutes. If a fitting does not thread smoothly, stop and reassess; forcing it is a mistake I would not repeat.
Check Pressure: IPC Requires Regulation Above 80 psi
Before installing a bidet sprayer, check your home’s water pressure. Attach a pressure gauge to a suitable threaded outlet, such as a hose connection, with all fixtures turned off. The reading should reflect static pressure, not a temporary drop while water is running. This detail matters. Under the International Plumbing Code, systems with pressure above 80 psi require pressure regulation, typically through a pressure-reducing valve. Local code adoption and amendments can differ, so confirm the requirement with your local plumbing authority.
If the gauge reads above 80 psi, have the pressure corrected before connecting the sprayer. A small shutoff valve helps control water at the toilet, but it is not a substitute for a pressure-reducing valve. Excessive pressure can strain hoses, fittings, and seals, even when connections look secure. After installation, turn the water on slowly and inspect each joint with a dry tissue; a tiny leak can be hard to see. This check can feel fussy. It is easy to rush past the pressure reading, yet that is precisely the part worth pausing over.
Gather a T-Valve, Seals, and an ASSE 1011 Vacuum Breaker
Before installation, close the toilet’s shutoff valve and flush to empty the tank. Place a towel beneath the fill connection; a little trapped water usually spills out. Fit the T-valve between the tank and fill hose, using the supplied seals and hand-tightening the connections before a gentle final turn. A seal can wrinkle if the valve sits crooked. Check its position before tightening.
Add an ASSE 1011 hose-connection vacuum breaker in the direction shown by its markings. ASSE 1011 covers devices intended to protect against backsiphonage; it is not a substitute for checking whether the complete sprayer setup is suitable for your plumbing. Keep the sprayer hose from kinking, and test every joint with the shutoff reopened slowly. Dry the fittings, wait several minutes, then check again. Small leaks are easy to miss.
The U.S. EPA’s WaterSense guidance reports that toilets use nearly 30% of an average home’s indoor water. That figure is a useful reminder to keep the tank connection sound, not a measure of sprayer savings. Confirm the sprayer and vacuum-breaker instructions before use, and close the T-valve after spraying if the assembly instructions require it. I would not assume every T-valve arrangement is identical; that is where careful checking matters.
Shut Off Water, Drain the Tank, and Fit the T-Valve
How to Install a Bidet Sprayer?
Shut Off Water, Drain the Tank, and Fit the T-Valve
Turn the toilet’s shutoff valve clockwise until it stops. Flush the toilet and hold the handle down to empty most of the tank. A little water may remain; use a sponge and shallow bowl to catch it. Place a towel beneath the fill connection, then disconnect the supply hose from the tank. If the shutoff valve feels stuck, don’t force it. Pause and seek plumbing help rather than risk a leak.
Tips: Check the T-valve’s washers before fitting it. Seat the valve between the fill valve and supply hose, keeping each connection straight. Hand-tighten the fittings first, then snug them gently with a wrench. Plastic threads can crack if overtightened.
Connect the sprayer hose to the T-valve, then turn the water on slowly. Watch each joint for several minutes and feel around the fittings with a dry tissue; even a small drip will show. Tighten a leaking connection slightly, then check again. If it still leaks, shut off the water and inspect the washer for misalignment or damage. Installation can feel fiddly, especially in a tight space, so take your time. Close the sprayer’s shutoff valve after use if one is provided.
Mount the Sprayer, Restore Water, and Check for Leaks
Turn off the toilet’s shutoff valve, then flush to relieve pressure in the supply line. Place a small towel beneath the connection to catch leftover water. Attach the sprayer hose to the compatible adapter, keeping any supplied washer flat and properly seated. Hand-tighten the fittings, then use a wrench only for a small final turn if needed. Too much force can damage threads or crush a washer. Mount the holder where your hand can reach it without the hose pulling tight. Keep it level. The first position may look convenient but feel awkward when seated, so check the reach before tightening the holder fully.
Open the shutoff valve slowly and watch each connection as water returns. Pause if you hear hissing or see a steady drip. Wipe the fittings dry, then press the sprayer trigger while aiming it into the toilet bowl. Release the trigger and inspect the hose ends and adapter again; a dry tissue makes small leaks easier to spot. Leave the valve open for several minutes and check once more. Go slowly. If a fitting still leaks after reseating its washer and gently tightening it, shut off the water and review the installation directions rather than forcing the connection. A mismatched adapter or damaged seal may need attention before use.
How to Install a Bidet Sprayer: Mount, Restore Water, and Check for Leaks
Typical DIY planning estimates for each installation stage. Actual time varies with the toilet’s connections and access to the shutoff valve.
Before disconnecting the supply line, shut off the water and flush the toilet. After installation, restore water slowly and inspect every connection for leaks.